Skip to content

Dear Friends and Fellow Food Lovers, First, we send you well wishes and love. Thank you for the wonderful support we received last week from our Canal House Station at Home Takeout Menu customers. It gave us such joy to be able to fill your fridge and tummies while strictly following the rules of social distancing in the effort to combat the spread of COVID-19. Please check our websites, Canal House Station and Canal House for continued updates. This week, our neighboring community, Bucks County, Pennsylvania, issued a Stay-At-Home order. Therefore, as of today, March 25th, 2020, we must suspend our Order Online/Curbside Pickup menu offerings for the next two weeks and/or until it is safe to resume our takeout service (and eventually, our full-service restaurant). We will keep you updated. In the meantime, what perfect timing to resume our daily blog, Canal House Cooks Lunch. We’ll share with you what we are cooking out of our own home cupboards and fridges. We hope it might give you and yours a few good ideas. Visit or sign up to Canal House Cooks Lunch. Thank you all so much for your support. We look forward to welcoming you back to Canal House Station as soon as we can. Eat well and stay healthy, dear friends. Christopher & Melissa

View on Instagram

A POT BEANS

We often keep a pot of brothy beans in the refrigerator (they’ll keep nicely for up to 5 days). It gives us an instant leg up on putting a meal together. We usually use cannellini but often cook what we have on hand or what sounds good to us. Canned beans are okay in a pinch, of course, but don’t really have the fresh sweet flavor and just-tender, somewhat toothsome texture of beans that you have cooked yourself. You get the point. Cook a pot of beans on Sunday, and we’ll show you how to eat well all week—cassoulet our way, braised escarole and beans, tuna and sausages with white beans, beans with spicy black olive vinaigrette, beans on toast with olive oil and fried sage.


NOTES ON DRIED BEANS

We cook beans all the time, but we do it instinctively. To verify that our methods were up to scratch, we dove in and did a little bean research. Turns out our instincts were right. Here’s what we found out.

BUYING: Choose beans that have been recently harvested and dried; this may be the most important factor in cooking a good pot of dried beans. As beans age, their outer shell becomes tough and impermeable. Sometimes really old beans will never get tender, even after hours and hours of cooking. Shop at a store that moves a lot of beans off their shelves, ensuring that you’re buying from a current crop. Though it may be hard to spot, look for an expiration date on the package.

SOAKING: To soak or not to soak, that is the question. Soaking hydrates and softens the dried beans, giving them a jump start. But you have to think ahead and remember to soak them in the first place. If you choose to soak your beans, they only need about 4 hours (the oft-used phrase “soak the beans overnight” is more about convenience). Or you can use the “quick” soak method: put the beans in a pot, cover them with cold water, bring the water to a boil, and remove the pot from heat. Cover the pot and let the beans soak for 1 hour. Drain, then cover the beans with fresh cold water and gently simmer them until tender. This method will shorten the cooking time a bit and leach out some of the indigestible carbohydrates that cause flatulence (unfortunately, some of the beneficial vitamins and minerals will also get poured down the drain). If you forgo soaking, just put the unsoaked beans right in a pot, cover with cold water, and onto the stove they go. But be sure that you cook them at the gentlest simmer so their skins don’t break.

SALTING: Kitchen lore has it that adding salt to beans while they cook will inhibit them from ever becoming tender, but it’s just not true. In fact, salt accelerates the cooking time by tenderizing the bean skins.

COOKING: For plump, creamy beans that hold their shape, cook them slowly over low heat in plenty of water.


BASIC COOKED DRIED BEANS

makes 9 cups

It is your preference whether to soak or not to soak. MH likes to hydrate the beans before cooking; CH believes that with the gentlest cooking you can jump right in without a soak. Look for the “Best Used By” date when buying a package of dried beans. The fresher the beans, the more quickly they’ll cook. One pound dried beans will yield about 6 cups of cooked beans. Cooked beans freeze beautifully.

[wpcol_1half id=”” class=”” style=””]

3 cups dried beans, unsoaked or soaked
for 4 hours or overnight
1 onion, halved
1–2 cloves garlic
1 branch fresh thyme, optional
[/wpcol_1half] [wpcol_1half_end id=”” class=”” style=””]
2 bay leaves
Salt
Really good extra-virgin olive oil
[/wpcol_1half_end]

Drain the beans and put them into a medium, heavy-bottomed pot. Cover them with cold water by 4 inches or so. Add the onion, garlic, thyme, if using, and bay leaves. Bring the beans just to a simmer over medium heat, stirring occasionally. Reduce the heat to low and very gently simmer them until they are swollen and tender, 30–90 minutes (or more), depending on the freshness of the dried beans. The beans should remain submerged while they cook, so add more water to the pot, if you need to. Remove the pot from the heat. Stir in a generous pinch of salt. Add a good glug of olive oil. Let the beans cool to just warm or to room temperature in the cooking liquid. (The beans will keep in the refrigerator for up to 5 days.

CASSOULET OUR WAY

serves 2

To make a traditional cassoulet—the emblematic “pot of beans” from France’s Lengadòc region—it takes a special earthenware pot, at least five different kinds of meats, and three to four days of fussing and tending to prepare and cook. When we don’t have the luxury of time, we make this simplified version. If we don’t have our own confit of duck to use for this simple cassoulet, we buy it already prepared from the market. It’s an easy weeknight meal and satisfies our hunger for the real thing.

[wpcol_1half id=”” class=”” style=””]
4 tablespoons extra-virgin olive oil
2 fresh Italian sausages, pricked
1 small yellow onion, finely chopped
1 clove garlic, finely chopped
Salt and pepper
[/wpcol_1half] [wpcol_1half_end id=”” class=”” style=””]
3 cups cooked white beans, with a little of their cooking liquid
Confit of 2 duck legs
1 large branch fresh thyme
1 bay leaf
2 tablespoons butter, melted
1 cup fresh bread crumbs
[/wpcol_1half_end]

Preheat the oven to 350°. Heat the olive oil in a medium, heavy ovenproof pot with a lid over medium heat. Brown the sausages all over, about 5 minutes. Transfer the sausages to a plate and set aside. Add the onions and garlic to the pot, season with salt and pepper, and cook until soft, about 5 minutes. Transfer to the plate with the sausages.

Add half the cooked beans to the pot. Arrange the sausages and duck legs on the beans, then add the onions and garlic. Add the thyme and bay leaf, and cover with remaining beans. Add about ½ cup of the bean cooking liquid.

Toss the breadcrumbs with the melted butter in a small bowl. Scatter the breadcrumbs evenly over the beans. Cover the pot and bake for 35 minutes. Uncover the pot, and bake until the breadcrumbs are golden, about 10 minutes. Remove from the oven and allow to rest for 10–15 minutes before serving.

WHITE BEANS WITH SPICY BLACK OLIVE VINAIGRETTE

serves 2–4

When we use canned beans, we like to give them a little love before we dress them. Drain them into a sieve, give them a good rinse under cold running water, then drain well and toss with a drizzle of olive oil and season with salt. Then go in with your dressing.

[wpcol_1half id=”” class=”” style=””]
½ clove garlic, minced.
¼ cup finely chopped pitted black olives
1 tablespoon finely chopped parsley leaves
1 tablespoon red wine vinegar
[/wpcol_1half] [wpcol_1half_end id=”” class=”” style=””]
¼ cup really good extra-virgin olive oil,
plus more for drizzling
Pinch of crushed red pepper flakes
Salt and pepper
2 cups cooked cannellini beans
[/wpcol_1half_end]

Stir together the garlic, olives, parsley, vinegar, olive oil, and red pepper flakes in a medium mixing bowl. Season with salt and pepper. Add the beans and toss gently to coat. Taste and adjust the seasonings. Transfer to a serving platter and drizzle with more olive oil before serving.

BRAISED ESCAROLE WITH WHITE BEANS

serves 2

Escarole always needs a good soak in cold water to rid it of the dirt trapped between its leaves. We wash it just before preparing this classic Italian dish so that the leaves still have water clinging to them when they are added to the skillet. This way, when they meet the warm oil they wilt gently instead of frying. Either of the smaller variety of dried white beans—navy or great Northern—work just as well as the more traditional cannellini here.

[wpcol_1half id=”” class=”” style=””]
1 head escarole, dark green outer leaves discarded, inner leaves separated and trimmed of dark green tops
¼ cup good extra-virgin olive oil
1–2 cloves garlic, thinly sliced
[/wpcol_1half] [wpcol_1half_end id=”” class=”” style=””]
1–2 cups cooked white beans with some of their cooking liquid or a small ladleful of water
Salt and pepper
[/wpcol_1half_end]

Wash the escarole leaves well and shake off some of the water. Put the olive oil and garlic into a large nonreactive skillet and warm over medium heat until fragrant, about 1 minute. Add the escarole and cook briefly, turning the leaves as they begin to wilt. Add the beans and some of their cooking liquid or water, season with salt and pepper, and braise just until the beans are warmed through and the escarole is still bright and colorful, 3–5 minutes.

BEANS WITH SAUSAGES & TUNA

serves 2

We love beans with either canned tuna or good sausages. But here, we poach fresh tuna in good olive oil and serve the tuna and sausages together to make one of the best surf ‘n’ turf dishes we know.

[wpcol_1half id=”” class=”” style=””]
One 8-ounce piece fresh tuna
Salt
Really good extra-virgin olive oil
1 bay leaf
A few black peppercorns
[/wpcol_1half] [wpcol_1half_end id=”” class=”” style=””]
1 lemon
2 Italian sausages
2 cups warm cooked white beans
Freshly ground black pepper
1 handful parsley leaves, chopped
[/wpcol_1half_end]

Season the tuna with salt, put it into a small pot, and barely cover it with olive oil. Add the bay leaf, the peppercorns, and a strip or two of zest from the lemon. Poach the tuna over low heat until it turns pale and is just cooked through, about 10 minutes. Remove the pot from the heat and let the tuna cool to just warm or to room temperature in the poaching oil. Grill the sausages over a hot charcoal fire, gas grill, or in a skillet over medium-high heat until they are browned all over and cooked through, about 10 minutes.

Spoon the beans onto two plates and season with salt and pepper. Divide the sausages and the tuna between the two plates. Moisten the beans with some of the poaching oil from the tuna. Scatter the chopped parsley on top and serve with wedges of lemon.


TOAST WITH BEANS & FRIED SAGE LEAVES

serves 2

By week’s end, there aren’t enough beans left in the pot to make much of a meal, so we spoon the last of them over toast rubbed with garlic and seasoned with salt and olive oil. We fry sage leaves for extra flavor and scatter them on top of the soft starchy beans. Finally, the beans get a last drizzle of good olive oil. Now that’s a perfect meal to end the week.

Rub 2 thick warm slices of toasted country bread with a raw clove of garlic. Put the toasted bread on two plates, drizzle with some really good extra-virgin olive oil, and sprinkle with a little salt. Put a generous spoonful or two of warm cooked beans on top of each piece of toast. Drizzle with more olive oil and sprinkle with salt and pepper. Meanwhile, heat ¼ cup vegetable oil in a small pot or skillet over medium heat until hot but not smoking. Fry a small handful of fresh sage leaves, a few at a time, in the hot oil until fragrant about 5 seconds. Transfer the sage with a fork to a paper towel to drain. Season with salt. Garnish the beans with the fried sage.

A Week of Chocolate Valentines for
Bon Appétit — Day 6

From Canal House Cooks Every Day (Andrews McMeel, 2012)

FALLEN CHOCOLATE SOUFFLÉ CAKE

serves 8

Like most chocolate lovers, we think that if you are going to the trouble of cooking with chocolate rather than just eating it in its pure and heavenly state, you better make it really good. If memory serves us, we first had this cake at Maida Heatter’s Miami house overlooking Biscayne Bay. No one can bake like Maida—she just has the touch. And this flourless chocolate cake was no exception. It had a crisp sugary crust that collapsed over its rich mousselike filling. Maida got the recipe from pastry chef Mark Allen, of the long-gone New York City restaurant Foodworks. He learned to make the cake at the Culinary Institute of America. And now we make it. Good recipes pass round and round, year after year. Every time we make this cake, we think of wonderful Maida.

8 ounces unsalted butter,
at room temperature (plus some
for greasing the pan)

1 cup granulated sugar,
plus ¼ cup for the pan

10 ounces semisweet or
bittersweet chocolate, chopped

¼ cup espresso or
very strong black coffee

8 eggs, separated
1 teaspoon vanilla extract
¼ teaspoon salt
Powdered sugar

Preheat the oven to 300°. Grease a nonstick tube or bundt pan liberally with butter. Sprinkle the ¼ cup of sugar into the pan and shake to coat the bottom and sides with the sugar. Some sugar will fall to the bottom of the pan, that’s just fine.

Heat the chocolate and coffee together in a heavy small saucepan set over a larger pan filled with simmering water over medium heat, and whisk until melted and smooth. Remove from the heat and set aside to cool for about 10 minutes.

Meanwhile, beat the butter with ¾ cup of the sugar in the bowl of a standing mixer or with an hand mixer on medium speed until pale yellow and very fluffy, about 5 minutes. Beat in the egg yolks one at a time, beating until very fluffy, about 5 minutes. Add the vanilla. Fold the cooled melted chocolate into the batter. Set aside.

In a clean bowl with clean beaters, beat the egg whites and salt together on medium speed until frothy, about 1 minute. Continue beating, gradually adding the remaining ¼ cup of sugar, until the whites are thick and hold a peak, about 5 minutes. Fold one-third of the whites into the chocolate batter, then fold in the remaining whites in 2 batches, taking care not to deflate the batter. Pour the batter into the prepared pan and bake for 2 hours. The cake will rise, then fall.

Cover the pan with a serving plate, turn the pan over, and unmold the cake onto the plate. It may collapse and look a bit messy, but that’s the nature of this cake. Serve warm, dusted with powdered sugar, if you like.


SaveSave

A Week of Chocolate Valentines for
Bon Appétit — Day 5

From Canal House Cooking Volume N° 7

GELATO DI GIANDUIA

makes about 1 quart

In any form, the classic Piedmontese combination of toasted hazelnuts and chocolate is one of our favorite flavors. You’ll see why, when you taste this luxurious gelato.

3 cups skinned hazelnuts
2¼ cups whole milk
1¼ cups heavy cream
¾ cup sugar
6 egg yolks
Pinch of salt
6 tablespoons unsweetened cocoa
1 tablespoon Frangelico or other
hazelnut liqueur
2 teaspoons vanilla extract

Heat the oven to 350° and toast the hazelnuts on a baking sheet until deep golden brown, about 15 minutes. When cool, finely grind 2 cups of the nuts in a food processor. Chop the remaining 1 cup of nuts and set them aside.

Put the milk and cream into a saucepan and bring to a simmer over medium heat. Remove the pan from the heat, stir in the finely ground hazelnuts, and steep for 1 hour. Strain through a fine-mesh sieve into another saucepan, pressing on the solids before discarding them. Add ½ cup of the sugar to the milk. Bring to a simmer over medium heat, stirring until the sugar dissolves.

Put the yolks, salt, and the remaining ¼ cup of sugar into a medium mixing bowl and whisk together until thick and pale yellow. Whisk in the cocoa. Gradually ladle about 1 cup of the hot milk into the yolks, whisking constantly. Stir the warm yolk mixture into the hot milk in the saucepan. Reduce the heat to low, and cook, stirring constantly, until the custard is thick enough to coat the back of the spoon and registers between 175° and 180° on an instant-read thermometer, 3–5 minutes.

Strain the custard into a medium bowl. Add the liqueur and vanilla and stir frequently until cooled. Cover and refrigerate until completely chilled, about 4 hours. This will keep in the refrigerator for up to 2 days.

Churn the custard in an ice-cream maker following the manufacturer’s direc-tions. Just before the gelato has finished churning, add the reserved chopped hazelnuts, letting the paddle stir them in. Transfer the gelato to a quart container with a lid. Cover and freeze for a couple of hours or until it is just firm.


SaveSave

A Week of Chocolate Valentines for
Bon Appétit — Day 4

From Canal House Cooks Every Day (Andrews McMeel, 2012)

RED VELVET CUPCAKES WITH MERINGUE FROSTING

makes 24–28

We make these every Valentine’s Day for all our sweethearts. The meringue frosting—light, silky-smooth, and sweet—beats all the others we’ve tried, hands down.

[wpcol_1half id=”” class=”” style=””]FOR THE CUPCAKES
12 tablespoons unsalted butter, softened
2 cups sugar
3 large eggs, at room temperature
¼ cup red food coloring
2 tablespoons good unsweetened
  cocoa powder
1 teaspoon vanilla extract
3½ cups cake flour, sifted

[/wpcol_1half]

[wpcol_1half_end id=”” class=”” style=””]1½ teaspoons salt
1½ cups buttermilk
1½ teaspoons white vinegar
1½ teaspoons baking soda

FOR THE MERINGUE FROSTING
1½ cups sugar
4 large egg whites, at room temperature
Pinch of salt
Large pinch of cream of tartar

[/wpcol_1half_end]

For the cupcakes, preheat the oven to 350°. Line muffin pans with paper with 24–28 cupcake liners and set aside. Beat the butter and sugar together in a large mixing bowl with a mixer on medium-high speed until pale yellow and very fluffy, about 5 minutes. Beat in the eggs one at a time, beating well after each addition. Add the food coloring, cocoa, and vanilla, and beat on medium speed until well combined.

Combine the flour and salt in a bowl. Add the flour and buttermilk to the butter-egg mixture alternately in thirds, beating after each addition until just combined. Mix the vinegar and bak-ing soda together, then add to the batter. Beat until the batter is smooth and well combined.

Divide the batter between the cupcake liners, filling them about three-quarters full. Bake until a skewer inserted into the center of the cupcakes comes out clean, about 20 minutes. Tip the cupcakes out of the pans, transfer them to a wire rack, and let cool completely.

For the meringue frosting, put the sugar and ½ cup cold water into a medium saucepan. Heat over medium heat, gently swirling the pan to help dissolve the sugar. When the syrup comes to a boil, cover the pan to let the steam run down the sides, washing away and dissolving any sugar granules clinging to the sides. Boil until the sugar is completely dissolved and the syrup is clear. Uncover, and continue boiling until the temperature registers 238° on a candy thermometer.

Meanwhile, put the egg whites, salt, and cream of tartar in a large mixing bowl. Beat with a mixer on medium speed until soft peaks form, about 2 minutes. Increase the speed to high and gradually pour in the hot syrup. Continue to beat until the whites are stiff, glossy, and have cooled to room temperature, about 15 minutes. Ice the cupcakes with the meringue frosting. (There may be frosting left over; unfortunately it doesn’t keep.)


A Week of Chocolate Valentines for
Bon Appétit — Day 3

From Canal House Cooks Every Day (Andrews McMeel, 2012)

THIN & CRISP CHOCOLATE CHIP COOKIES

makes about 5 dozen

Our friend Katherine Yang is a New York baker whose exquisite pastries and desserts always balance sweet and savory perfectly. We wanted the best chocolate chip cookie recipe ever, so we asked her advice. Always gracious, she shared her recipe for these delicate, crisp, salty-sweet cookies—just the kind we had in mind. Like most bakers, Katherine relies on measur-ing her ingredients by weight, not volume, for the most consistent results. We agree, but have included both methods below in case you don’t have a scale.

10 ounces room temperature
high-fat butter
1¼ cups (298g) dark brown sugar
¾ cup (149g) granulated sugar
1 tablespoon vanilla bean paste
or extract
2 teaspoons kosher salt
2 large eggs
1¾ cups plus 2 tablespoons (265g)
all-purpose flour
1 teaspoon baking soda
8 ounces chocolate chips

Preheat the oven to 375°. Line baking sheets with parchment paper. Combine the butter, brown sugar, granulated sugar, vanilla bean paste, and salt in the bowl of a standing mixer fitted with the paddle attachment. Mix on medium-high speed until light, about 3 minutes. Add the eggs and mix on medium speed until blended, about 2 minutes.

Whisk the flour and baking soda together, then add to the dough, continuing to mix on medium speed for 2 minutes. Stir in the chocolate chips.

Remove the bowl from the mixer. Using a spatula, quickly mix the dough, scraping down the sides and bottom of the bowl. Drop the batter by the well-rounded tablespoon, about 4 inches apart, onto the parchment-lined baking sheets. Bake until golden brown, 10–11 minutes. Let the cookies cool for 5 minutes before transferring them to a wire rack to cool.


SaveSave

A Week of Chocolate Valentines for
Bon Appétit — Day 2

From Canal House Cooking Volume N° 2

CHOCOLATE GINGERBREAD

serves 12

We aren’t gooey cake fans so this cake is perfect for us—more about flavor than sweetness. The gooiest part is pouring on the melted chocolate icing. We smooth it out and just let it run over the sides of the cake. Who can resist warm gingerbread on cold winter afternoons?

FOR THE GINGERBREAD
2½ cups flour
2 teaspoons baking soda
½ teaspoon salt
1 tablespoon ground ginger
1 teaspoon ground cinnamon
1 teaspoon ground allspice
1 teaspoon dry mustard
½ teaspoon ground black pepper
8 tablespoons unsalted butter, softened
¼ cup dark brown sugar
2 eggs
1 cup molasses or sorghum
8 ounces chocolate chips, melted
1 cup espresso or strong coffee, cooled

FOR THE CHOCOLATE ICING
8 ounces chocolate chips
½ cup heavy cream

For the gingerbread, preheat the oven to 375°. Grease a 9-inch springform cake pan, then dust it with flour, tapping out any excess.

Sift or whisk the flour, baking soda, salt, ginger, cinnamon, allspice, mustard, and pepper together in a large bowl then set aside.

Put the butter into a large mixing bowl and beat with an electric mixer on medium speed until light and fluffy. Gradually beat in the brown sugar, about 2 minutes. Beat in the eggs at one at a time. Beat in the molasses and the choc-olate until smooth. Add the dry ingredients and the espresso alternately while you continue to beat the mixture. Use a rubber spatula to help incorporate any batter on the bottom or sides of the bowl. Pour into the prepared cake pan and bake until the top springs back when you lightly press it in the middle, about 40 minutes. Remove from the oven and place on a rack to cool.

For the chocolate icing, while the cake cools, heat the chocolate and the cream together in a small heavy pot over low heat. Stir with a whisk as it melts.

Transfer the cooled gingerbread onto to a plate. Arrange strips of waxed paper under the edges of the cake to keep the plate clean. Smooth the icing on top of the gingerbread, allowing it to drip over the sides. Remove the paper.


SaveSave

A Week of Chocolate Valentines for
Bon Appétit — Day 1

From Canal House Cooks Every Day (Andrews McMeel, 2012)

GIANDUIA

makes about 2 cups

We slather this creamy chocolate and toasted hazelnut spread—our purer, more flavorful version of Nutella, the commercial brand available throughout the world—on warm toast for breakfast. (We’ve found that it also tastes sinfully good with Oreo cookies, but let’s just keep that our little secret.)

1 generous cup (5 ounces) skinned hazelnuts
Large pinch of sugar
8 ounces semisweet chocolate
½ cup heavy cream
4 tablespoons salted butter, cut into pieces

Preheat the oven to 350°. Spread the hazelnuts out on small baking sheet or in an ovenproof skillet and toast them in the oven until they are a deep toasty brown, about 15 minutes. Remove them from the oven and set aside to cool completely. Grind the hazelnuts with the sugar in batches in a food processor to a fairly smooth, buttery paste.

Melt the chocolate in a heatproof medium bowl set over a pot of simmering water over medium-low heat, stirring often. Remove the bowl from the heat and whisk in the cream and butter. Stir in the ground hazelnuts. The gianduia will thicken and become soft and peanut butter–like as it cools. It will keep at room temperature in a covered container for up to 2 weeks.


SaveSave

Ithaca

by Constantine P. Cavafy

When you set out on your journey to Ithaca,
pray that the road is long,
full of adventure, full of knowledge.
The Lestrygonians and the Cyclops,
the angry Poseidon — do not fear them:
You will never find such as these on your path,
if your thoughts remain lofty, if a fine
emotion touches your spirit and your body.
The Lestrygonians and the Cyclops,
the fierce Poseidon you will never encounter,
if you do not carry them within your soul,
if your soul does not set them up before you.

Pray that the road is long.
That the summer mornings are many, when,
with such pleasure, with such joy
you will enter ports seen for the first time;
stop at Phoenician markets,
and purchase fine merchandise,
mother-of-pearl and coral, amber and ebony,
and sensual perfumes of all kinds,
as many sensual perfumes as you can;
visit many Egyptian cities,
to learn and learn from scholars.

Always keep Ithaca in your mind.
To arrive there is your ultimate goal.
But do not hurry the voyage at all.
It is better to let it last for many years;
and to anchor at the island when you are old,
rich with all you have gained on the way,
not expecting that Ithaca will offer you riches.

Ithaca has given you the beautiful voyage.
Without her you would have never set out on the road.
She has nothing more to give you.

And if you find her poor, Ithaca has not deceived you.
Wise as you have become, with so much experience,
you must already have understood what Ithacas mean.

A Celebration Was Called For

Last week we finished the final phase of production on our forthcoming book, Canal House Cooking–Volume N°4–Farm Markets & Gardens. We’d been glued to our computers for days (and nights) tweaking layouts, syncing images and text files, pouring over the final pages, and inputting corrections. And then, finally, with a push of the button, the final finished files flew off to Wisconsin to be printed and bound. We sat back and breathed a satisfied sigh.

It was a momentous day, one that needed a proper celebration, after all. So we poured tall glasses of bone-cold pink champagne, opened up a nice fresh bag of salty potato chips, and tucked into the “from-scratch” onion dip that our friend and design colleague, Teresa Hopkins, had brought to the studio earlier that day.

As we sipped and crunched we couldn’t agree on what was more delicious, the exquisite champagne, the cool onion-y dip, or the happiness we were all feeling for bringing our newest darling, Volume N°4, into the world.

Canal House Cooking Volume N°4, Farm Markets & Gardens will be available in early July.

ONION DIP

makes a generous 2 cups

1 tablespoon butter
1 tablespoon olive oil
2 medium onions, diced
Kosher salt
1 ½ cups sour cream
¾ cup mayonnaise
¼ teaspoon garlic powder
Pepper

Melt the butter and the olive oil together in a medium skillet over medium-high heat. Add the onions, season with a big pinch of salt, and sauté until deep golden brown, 15–20 minutes. Reduce the heat if the onions begin to brown too quickly. Transfer to a bowl and set aside to cool.

Mix the sour cream, mayonnaise, garlic powder, and cooled onions together in a medium bowl. Season with salt and pepper. Cover and refrigerate until ready to serve. Garnish with chopped fresh chives, if you like. The dip will keep in the refrigerator for up to 1 week.

Lunch for the creative crew
from Williams–Sonoma


Spring Sorrel Soup

Poached Wild Salmon with a “Sauce” of Peas, Bacon, and Chives

Young Leaves, Fresh Herbs, and Wild Violets with Lemon and Olive Oil

A Very Ripe French Brie and Crunchy Bread

Strong Coffee and Cookies


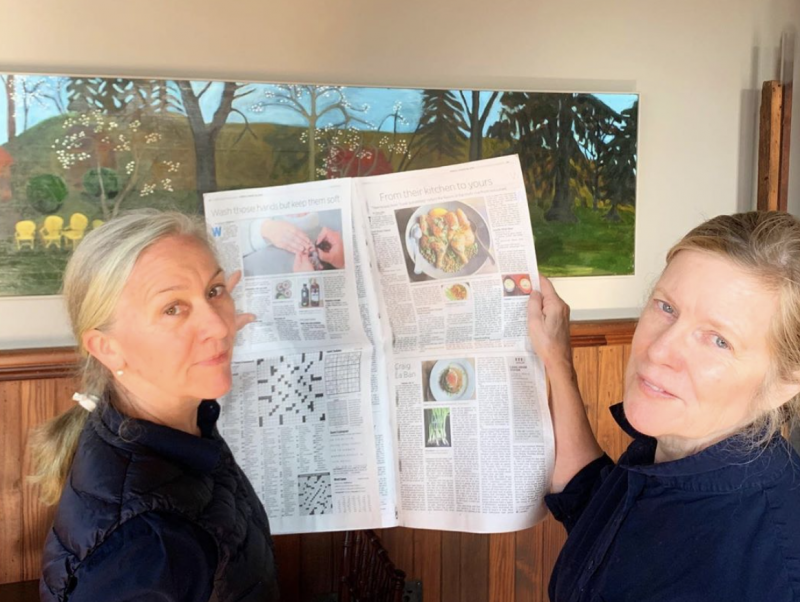
The other day the creative crew from Williams-Sonoma came for lunch. It was a beautiful sunny spring day with a blue sky full of big puffy clouds. Thank heavens there was still enough of a chill in the air so we could justify building a fire in the wood-burning stove—a fire always seems to cheer and cozy the whole place up. So we had the best of both seasons that day.

We made a special lunch in their honor and had a wonderful time before they had to run off and jump on a plane back to San Francisco. We talked about all kinds of things but they must have really been listening when we spoke of our love of Meyer lemons. They told us of lemon trees laden with fruit right in their backyards—Oh California!  A few days later a big bulging box arrived at the studio. They had picked a pile of Meyer lemons from their trees and sent the mother lode to us as a thank you present for lunch. Now that was the Thank You “Note” of all times in our book.

Here’s how we preserved the lemons and along with them the memory of the day and their lovely gift.

PRESERVED LEMONS

Everyone needs a few culinary tricks up their sleeve—or, better yet, in their refrigerator. If you live in a metropolitan area with lots of ethnic shops, you’ll be able to find these lemons already cured. Living far from those stores, we make our own—big jars of them that last us throughout the year. And it is so well worth it. These golden treasures are money in the bank as their deep salty-sour flavor can brighten up practically any dish. Actually, we have to restrain ourselves from using them in just about everything.

We like to use Meyer lemons, a sweet, thin-skinned variety (most likely a cross between a mandarin orange and a true lemon). You’ll find them in the market from fall through spring. But any variety of lemon will do. In fact, a thicker-skinned lemon is the traditional choice in Morocco, where this pickling method originated.

Preserved lemons are typically rinsed before they are added to stews, tagines, soups, and couscous dishes. Only the rind is used and the pulpy flesh gets discarded. When our own preserved lemons are still new (aged between one month and about six months), we use both rind and flesh, not even bothering to rinse the lemons. The salty brine softens the rind until it is almost translucent and makes the flesh plump and supple. The longer the lemons cure, the saltier they get, so taste them first to decide how you will cook with them. Preserved lemons will last up to 1 year in the fridge.

Lemons, washed
Kosher salt
Sterilized wide-mouth container with a tight-fitting lid

Cut the lemons (almost all the way through) into quarters, keeping them attached at the stem end. Working over a bowl, tamp the inside of each lemon with salt. Tightly pack the salt-filled lemons into the sterilized container. Pour more salt over the lemons as you fill the container. Cover the salt-packed lemons with freshly squeezed lemon juice.

Store in the refrigerator. Turn the container occasionally for the first few weeks to moisten all the lemons with the ever-accumulating salty brine. The lemons should eventually become submerged in this brine. If the brine doesn’t completely cover them after a month, use a metal kitchen spoon to gently press the lemons under the surface.

Recipe from Canal House Cooking, Volume N° 1


Belle Syrah

We’re having a perfect spring.  The mornings are chilly and the afternoons are warm and sunny.  Once a week or so the skies open up and a big shower drenches the earth and swells the canal outside our windows.  They’re having the same weather in the Rhone Valley in France so we’ll pretend we’re there.  While we’re busy tending our young spring gardens, winemakers in the Rhone are tending to vines that are also getting started for the season.

They’re hardly thinking about the rosés they bottled in the fall, but we’re thinking about drinking them.  The best thing to accompany the soft lettuces, sharp radishes, and poached salmon we’re eating is rosé, and Yves Cuilleron makes one of our favorites.  He’s sort of a quiet celebrity in the Rhone, known for his impressively soft Condrieu whites, but it’s the bright, lush, rosé we turn to with its silky texture and coppery pink color.

It’s called Sybel, meaning “belle syrah” and it’s the only rosé Yves Cuilleron makes each year.  From all handpicked syrah grapes this northern Rhone lovely is organically made and delicious.  They’ll be releasing a 2009 vintage in early June, but if you can still find it, 2007 was a special year in the Rhone and this wine is just right, right now.  For around $15 it’s just right for us for any occasion.   The younger brother—the 2008 vintage—has not opened up quite as much, but it’s a stellar steal for $9.99 at 3 Cups.

Asparagus with Irish Butter

Local asparagus arrived a few weeks ago. Big fat green spears, of course, and a deep reddish purple variety called Viola. The first site of them at a local farm market, standing tall and bending—all wild-looking, loose in their buckets of water—took our breath away. Spring had arrived!

So early this year, as we do each Spring, we’ve begun feasting on these local zaftig beauties and much prefer them to the straight thin asparagus that you find in the supermarket. We take the extra time and trouble and always peel off their skin with a vegetable peeler to just below the tip not only to pretty-up the spears and make them more tender, but especially to rid them of the fine sand lodged in those small flat leaves along the spear that look like fins.  This year, we’ve been eating our asparagus bathed in a luxurious lemony butter sauce, similar to a hollandaise, but better—fresher tasting, not so cloyingly thick.  We first learned how delicious it was at Ballymaloe with Darina Allen—the high priestess of Irish cuisine. It relies on the salted Irish butter we’re so crazy about from Kerrygold—but other brands of European-style high-fat butter will suit. Here’s a preview of the recipe that will be in Canal House Cooking Volume N°4.

It is quite simple and it goes a little something like this:  Whisk 2 egg yolks together with 2 tablespoons of water in a heavy saucepan. Begin warming the beaten yolks over very low heat, whisking all the while. Then gradually add 8 tablespoons of cold salted Irish butter, 1 tablespoon at a time, whisking until each tablespoon of butter has been incorporated into the sauce before you add the next. The sauce will thicken and lighten, becoming almost foamy. Take the pan off the heat and whisk in more or less the juice of half a lemon to your own taste. This sauce isn’t as finicky as most delicate butter sauces. We keep it warm over a pot of hot water.

Maybe you’ll want to honor your asparagus with this deliciousness, too.

Smell the peaches

Today our first day of all things, we are out of the studio shooting the last images for Canal House Cooking Volume N° 4. We give you this picture to remind you to stop and smell the peaches while you’re moving through your day. Come back and see us tomorrow.

Claire Ptak, chef owner of London's Violet Cakes
Back To Top